The Head Form Pattern
How To Assemble The Head Form
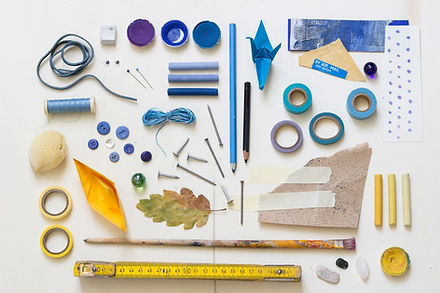
What You’ll Need
-
The Head Form Pattern (click here to buy PDF in A4 or Letter Format)
-
Computer and printer (with lots of ink)
-
210gsm paper card (about 8 sheets)
-
Very sharp scissors
-
Sharp cutting blade
-
Cutting mat
-
Lots of 3/8” tape (10mm) … I used Scotch 3M brand tape
-
Ruler
-
A couple of hours
Just like the Miyumi dress form pattern, this is not an easy project. It’s going to take skill, patience and a whole lot of time. You need to cut accurately down the center of the line and tape accurately. If you’re slightly out on your cutting then the length of the curves will change and the pattern pieces may not line up. You’ll very quickly see if you’re out as I’ve added arrows .... these are your life line so use them … if they don’t match perfectly then it’s probably because you haven’t cut absolutely perfectly down the center of the line. I can’t stress this enough.
I don’t recommend using cheap tape as it will also lack the holding power you’ll need. Likewise tape wider than 3/8“ (10mm) can affect how the pattern pieces curve and also not sit flat. I like to use lots small bite sized lengths around 25mm to 30mm long each as they’re the most manageable on all the curves … you could use longer pieces on the long straighter sections.
The pattern includes all the pattern pieces you need to create a head form for all the (female) crown sizes, 54cm to 62cm in 1cm increments. It's a complete package. Once the head form is assembled, papier mache will be applied to the inside of the form. The completed hard form can then be sanded and lacquered.
This project takes time and skill and is recommended for experienced crafters only ...
Difficulty: difficult
Skill level: moderate
Copyright Note: this pattern and it's instructions are intended for home use only. Using this pattern to produce head forms or modifying it for resale or any other commercial use is strictly prohibited. It is intended for use as a pattern making or display aid. This pattern is not to be shared with others. One pattern is for use by one person. By purchasing this pattern you are agreeing to these copyright terms.
Step One
The same rules that applied to making the Miyumi dress form apply to the head form ... you really need to cut accurately, and use lots of small sections of tape. The notch lines are there to help you asses where to place pieces and will indicate when you haven't cut all that well. Every pattern piece is labelled with either a number or letter and has guides which tell you to which piece is is to be joined to. The pieces are also labelled as left or right .... if they don't have a left or right label that means they sit on the center line. It's all relatively intuitive ... or at least I think it is!
Start by cutting out pattern pieces 1 through 3, both sides (image 1). Apply a narrow line of tape to the top edge of piece 1 ... I actually halved the width of my tape with a cutting blade to 5mm as there's some pretty tight curves and I don't want to cover the entire face with too much tape at this stage (image 2). When joining piece 2 to piece 1, I started at the center notch and then worked my way to each end. Then applied the narrower tape to the top edge of piece 2 (image 3).
Image 1


Image 2
Image 3


Image 4
Image 5
Again when you apply piece 3, start at the center notch and work your way to each end (image 4). All three pattern pieces should end at a nice neat corner. To hold them in place and prevent movement later it's a good idea to apply a little tape to the inside at each end (image 5).


Image 6
Image 7
Image 8
Image 9
Cut out the left and right sides of pattern piece 4 and tape together at the center front (image 6). Apply the right side assembly to pattern piece 4 starting in the middle again and working your way to either end (image 7) ... repeat for the left side. Fold over the tape at the center to lock it into place (image8) ... this stops the very thin section from moving when you apply the lips.
Cut out pattern pieces A through to E and apply tape to the top outer edge of pieces B through E (image 9)


Image 10
Image 11
Image 12
Assembling the lip sections is really tricky and takes some pretty good hand eye coordination. If you don't want the lip sections in your head form then just go straight to applying pattern piece B and later put a flat piece of card to close the mouth if you don't want the hole either.
If you do want the lips, start by applying piece E from the center (image 10) and working you way to each end ... you may need to tilt the piece to a right angle to get the curves to match up (image 11) ... it's not easy so go gently and don't stretch the card. When you've finished, lock piece E into place by taping the inside in a few places (image 12).


Image 13
Image 14
Image 15
Next repeat with patter piece D. Note that pattern piece D isn't as wide as piece E so start at the center as always and work your way to each end (image 13). Do the same with Piece C ... it should fit together at about a 120 degree angle on the inside (image 14). Repeat again with piece B ... this time you'll notice that the ends of piece B fill the narrower space left by pieces C and D ... a few times in the beginning, mine didn't line up to well because I didnt get all the pieces centered and closely fitting ... this is the make or break for the mouth section (image 15).


Image 16
Image 17
Image 18
hold the corner of piece B right into the corner of the mouth and lock it into place on the inside with a small piece of tape (image 16) ... should be a nice fit on the outside ... if it isn't you'll need to try again or trim it up slightly (image 17). Lastly tape the top part of piece B to piece 1 inside and out (image 18).
The nose is best attached from the inside ... apply tape to the inside edge first then join it to the center of piece B (images 19 and 20). If all that worked then you've done the hardest part already!


Image 19
Image 20
Step Two
Cut out the left and right sides of pattern piece 5, the nose. There's a straight section just below the first notch that you use to join the two sides together, and a little curve just at the end (image 21). Next apply quite a few little pieces of tape to the bottom of the nose so you can tape neatly whilst going around a tight corner (image 22). Starting in the center, apply the nose to piece A, one piece of tape at a time (image 23) ... pulling it tightly all the way to the end (image 24).


Image 21
Image 22
Image 23
Image 24
The sides of the nose can be tricky if you didn't cut neatly or the very first cheek assembly pieces didn't come together neatly as a point ... you may need to rejoin a few pieces to make it neater or as a last resort trim it slightly, but it should look like image 25. I find it easier to join the edge of the nose from the inside first (image 26), checking the notch lines up (image 27), then taping from the inside again until the next notch (image 28 and 29).


Image 25
Image 26
Image 27
Image 28
Image 29
Lastly, join the edge of the eye socket from inside (image 30), lining up the end of pattern piece 5 between the two notches on piece 3 (image 31). With the eyes I just applied tape to the entire inside (image 32) then pushed it into place. Note how my top center notch isn't perfect because I didn't line up the top of piece 3 to the nose very well (image 33) ... but I'm not going to re-do it.


Image 30
Image 31
Image 32
Image 33
The final face section is the part that locks the chin shape ... smart people will realize that by changing the curvature of this piece you can narrow or square the jaw ... that's deliberate. At least make it up as intended first so you have a reference before making alterations ... you'll also need to adjust piece 14 if you adjust piece 6! Be warned.
Apply tape to the outside curve of piece 6, putting snips in your tape so you can curve as you attach (image 34). Start in the center (image 35) and work your way to each end ... apply a locking tape at the end that wraps to the inside so it doesn't move (image 36). Note that there will appear to be a kink in the jaw now ... that's supposed to be there ... it creates the shape at the bottom of the cheek that forms the jowls ... I couldn't help myself!


Image 34
Image 35
Image 36
Step Three
The crown section of the head form is the easiest part ... starting with the left and right sides of pattern piece 7 (image 37). Apply tape to the pointy ends of piece 7 and join it to the middle of the nose/brow section between the notches (image 38) ... repeat for the other side (image 39) then slowly pull the two sides together working up from the bridge of the nose (image 40) until you get all the way to the end of both pieces 7. Apply tape to the center edge of piece 8 and join it to the other piece 8 (image 41).


Image 37
Image 38
Image 39
Image 40
Image 41
Join section 8 to the end of section 7 (image 42). Pieces 9 and 10 (image 43) need to be joined to each other (image 44) before applying them to the 7/8 section. As you did with piece 7, join piece 9 to piece 5 first, then work your way down the long edge all the way to the end (image 46) ... repeat for both sides. You do exactly the same for the left and right sides of piece 11 too only this one is the full length already so you just need to join it (image 47).


Image 42
Image 43
Image 44
Image 45
Image 46
Image 47
Piece 12 is a bit different ... it's actually easier to tape (image 48) and join the long edge first before joining it at the brow to piece 5. Image 49 shows how the little corner lines up with the notches in piece 3 .... tape that into place on both sides (image 50).


Image 48
Image 49
Image 50
Cut out both left and right pattern pieces 13 and apply tape to the front edge and the lower edge as shown in image 51. Join first at the notches on piece 12 (image 52) and work your way around until it meets the sharp corner of the cheek bone (image 53).


Image 51
Image 52
Image 53
Pattern pieces 14 (left and right) are the last of the head section pieces ... it closes the left and right sides and folds underneath the chin. It's not always easy to line up perfectly because it's a long piece that crosses 5 others, so there's quite a bit of room for error. Apply tape to the front edge first (image 54) and start by lining it up at the apex of the cheek bone .... not at either end or the middle. Work your way down to the center front of the chin .... mine is a little out (image 55) but close enough not to be a real problem ... it will result in a gap of around 1.5mm at center front chin which I'll just cover with tape. Continue to the top and close everything up (image 56).


Image 54
Image 55
Image 56
The final section is the neck. Cut out the left and right sides of piece 15 and join them together at center front (image 57). The neck pieces are best attached from the inside first so run a number of pieces around the inside edge of the head at regular intervals.


Image 57
Image 58
Image 59
Image 60
Starting at center front, apply piece 15 to the head (image 58), working all the way around (image 59) using the notches until both ends meet at center back (image 60). Apply tape to the outside of the join all the way around the neck.


Image 61
Image 62
We do exactly the same with piece 16 as we did with piece 15 (images 61 and 62). This will give us the completed head form with the exception of the cap (image 63). We don't apply the cap yet or we can't paper mache from the inside (coming soon).
Something else to consider is that for each crown size there is a variation of around 1.5 to 2.5cm in the neck measurement for around 90% of the population. For this reason I've used the smallest neck size ... you'll need to put this neck on to hold the head the correct shape. Then you can select the neck from a larger size and put it around the smaller one .... draw a new edge for cutting and applying the larger size (each neck size is 4mm larger than the previous in this pattern set) and apply the new one. You really don't want to go up more than 3 sizes for the 54 to 58cm crowns or 2 sizes for the 59 to 60cm crowns or you'll be beyond average for RTW. If you know your RTW range then by all means do as you need to.

Image 63